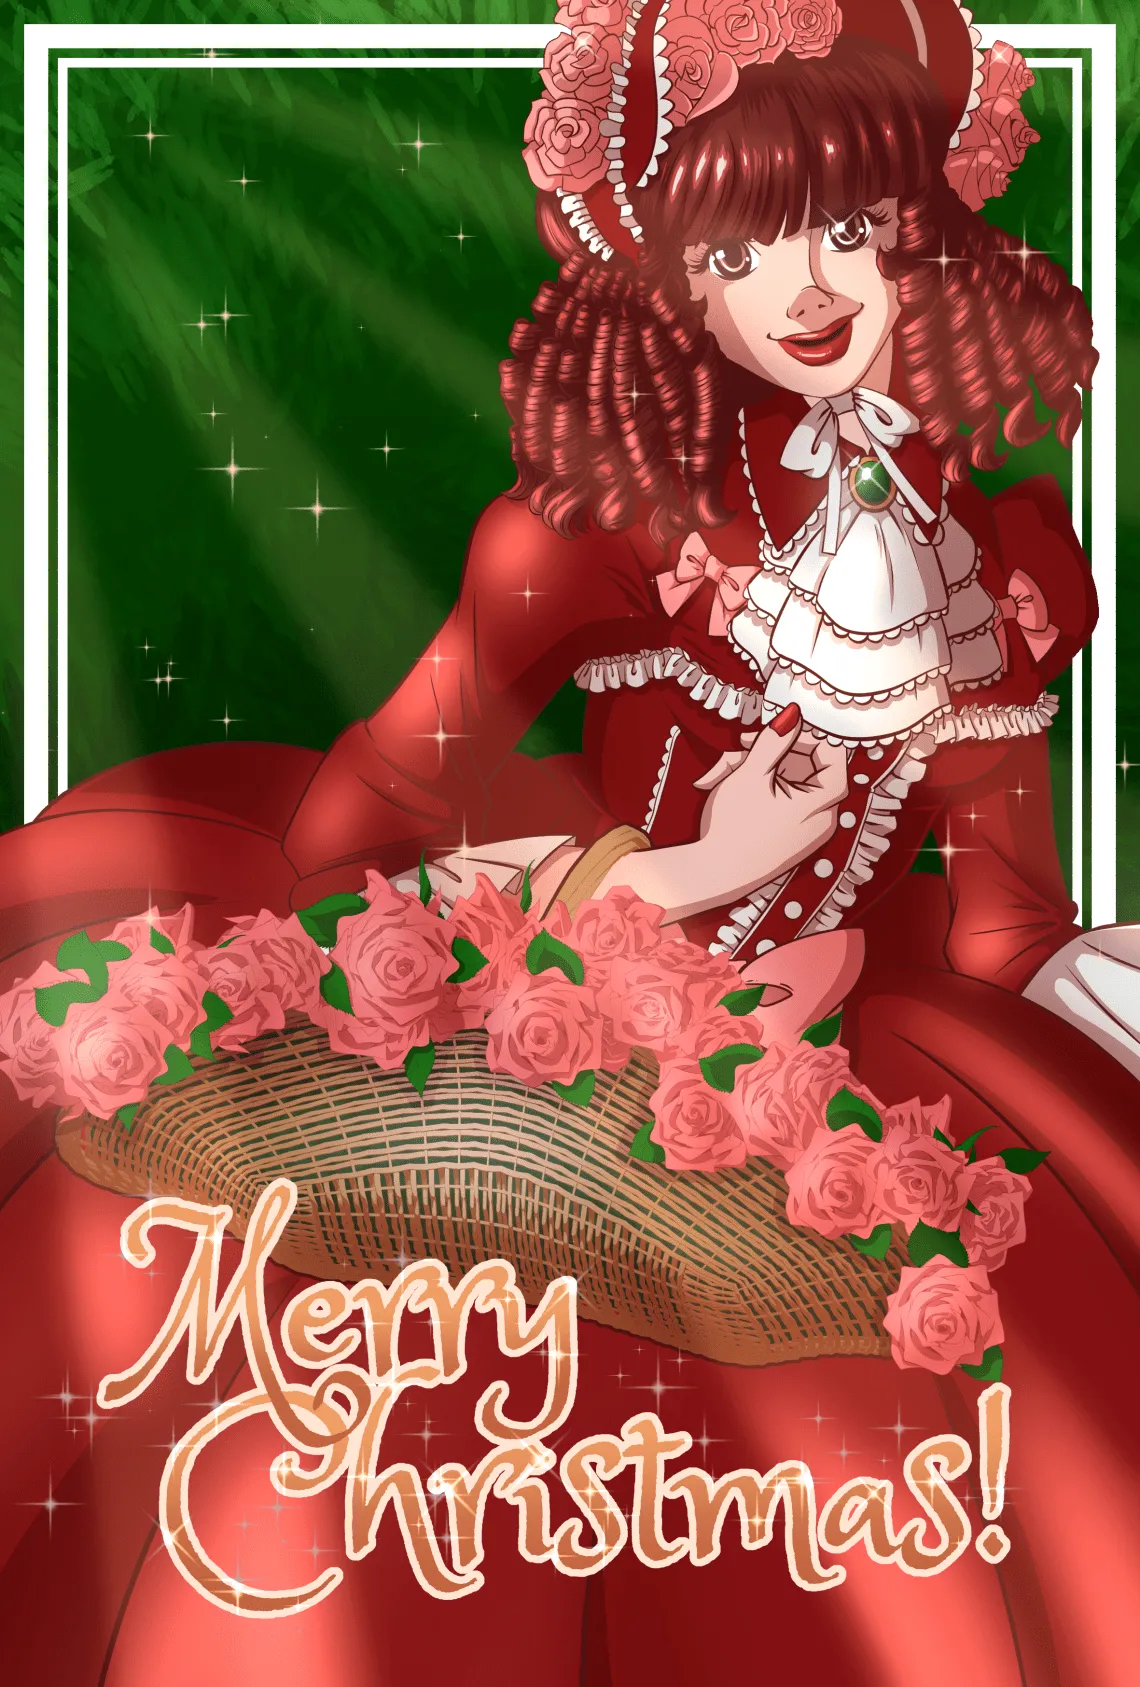
Merry Christmas Everyone!
I wanted to showcase my Christmas 2020 postcard and go more in-depth with how I made it.
This work is done using Clip Paint Studio and Blender.
Rough Sketch to Ink
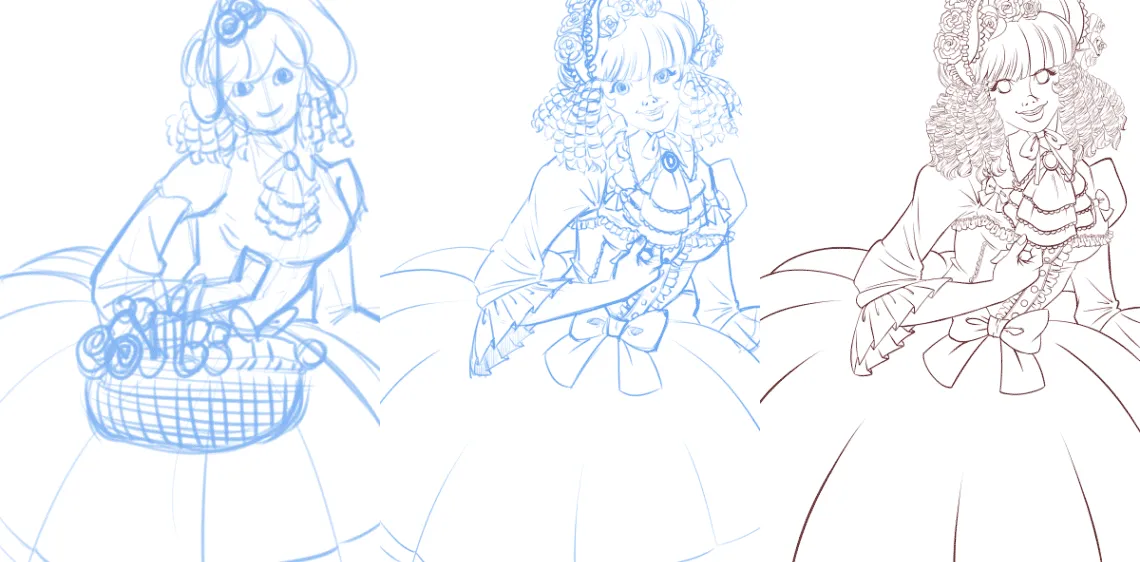
This drawing started out life as a really rough sketch in Clip Paint Studio. I tried to get the general pose down and the wicker basket accessory. Originally I wanted to have more than just flowers — presents too, because it’s for Christmas. In the end though, I kept it to flowers.
In Clip Paint, I turned the rough craft into a blue tinted layer and drew over top in a new layer and added a lot more details. I know with Lolita you want to make the dress much more ornate — a pattern or print over the dress or a lot of ruffles. I left the volume of her dress decidedly plain, because I didn’t want to have a complex design compete with the “Merry Christmas!” lettering that I was going to put over it. Instead I added the ruffles and frilly lace to the bodice.
Once I had the pencils done, I began to ink. This is one of the first times I’m using Clip Paint Studio’s vector layer. I shied away from it for a long time. I was used to using a raster layer to ink the lines with a pixel brush. There are some great advantages to use vectors. Obviously, the lines stay crisp no matter what the resolution. I can blow these lines up even larger if I want too and it should remain just as sharp. Another great reason to use the vector layer in Clip Paint are the vector tools. You can erase vector segments making it easy to draw over existing lines and then just with a quick stroke remove the lines you don’t want.
The Ringlet Hairstyle
Is done with a custom brush I made in Clip Paint.
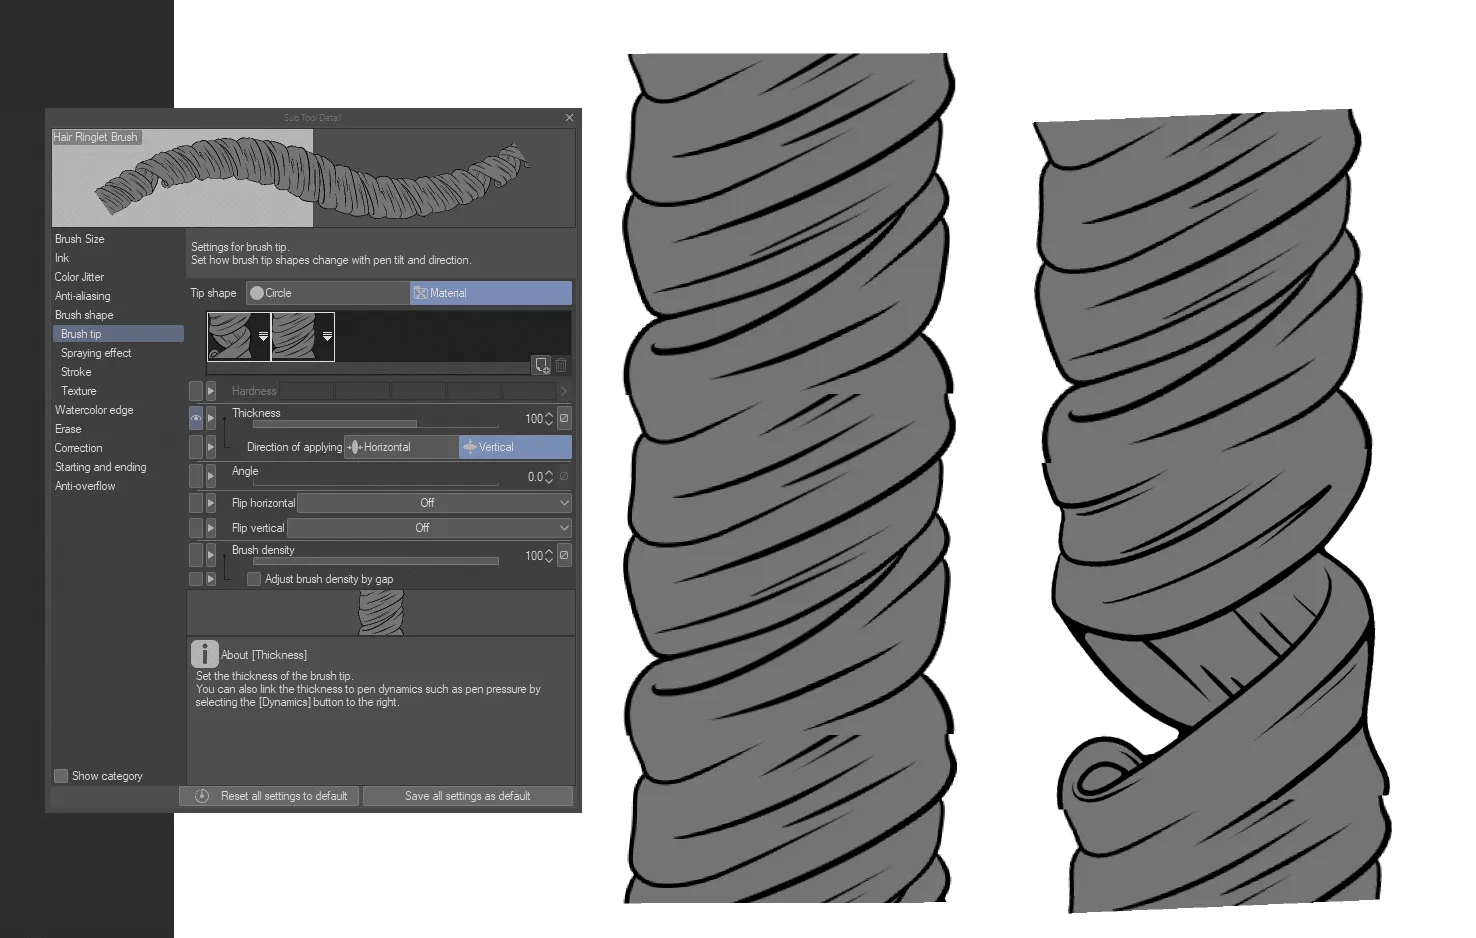
This admittedly took a bit of experimentation and trial-and-error.
Mainly trying to get a tile-able hair ringlet texture.
In the image above you can see it blown up to an extreme brush-size and it doesn’t quite tile nicely, but at the size I used it as, it looked really good.
Making the brush wasn’t difficult once I got the tiled assets. I registered them as brush materials in Clip Paint, and then I copied an existing brush. I went to “Brush Tip” in the tools panel for the brush and chose “Materials” instead of “Circle”. From there you can pick the materials you registered. I also set the brush to randomly decide which which tile texture to use. That way when you make a stroke it’ll place different sections and give what you draw a bit of variety.
Now, the brush is far from perfect.
It’s good enough for my needs. I would not say I was an expert at custom brushes.
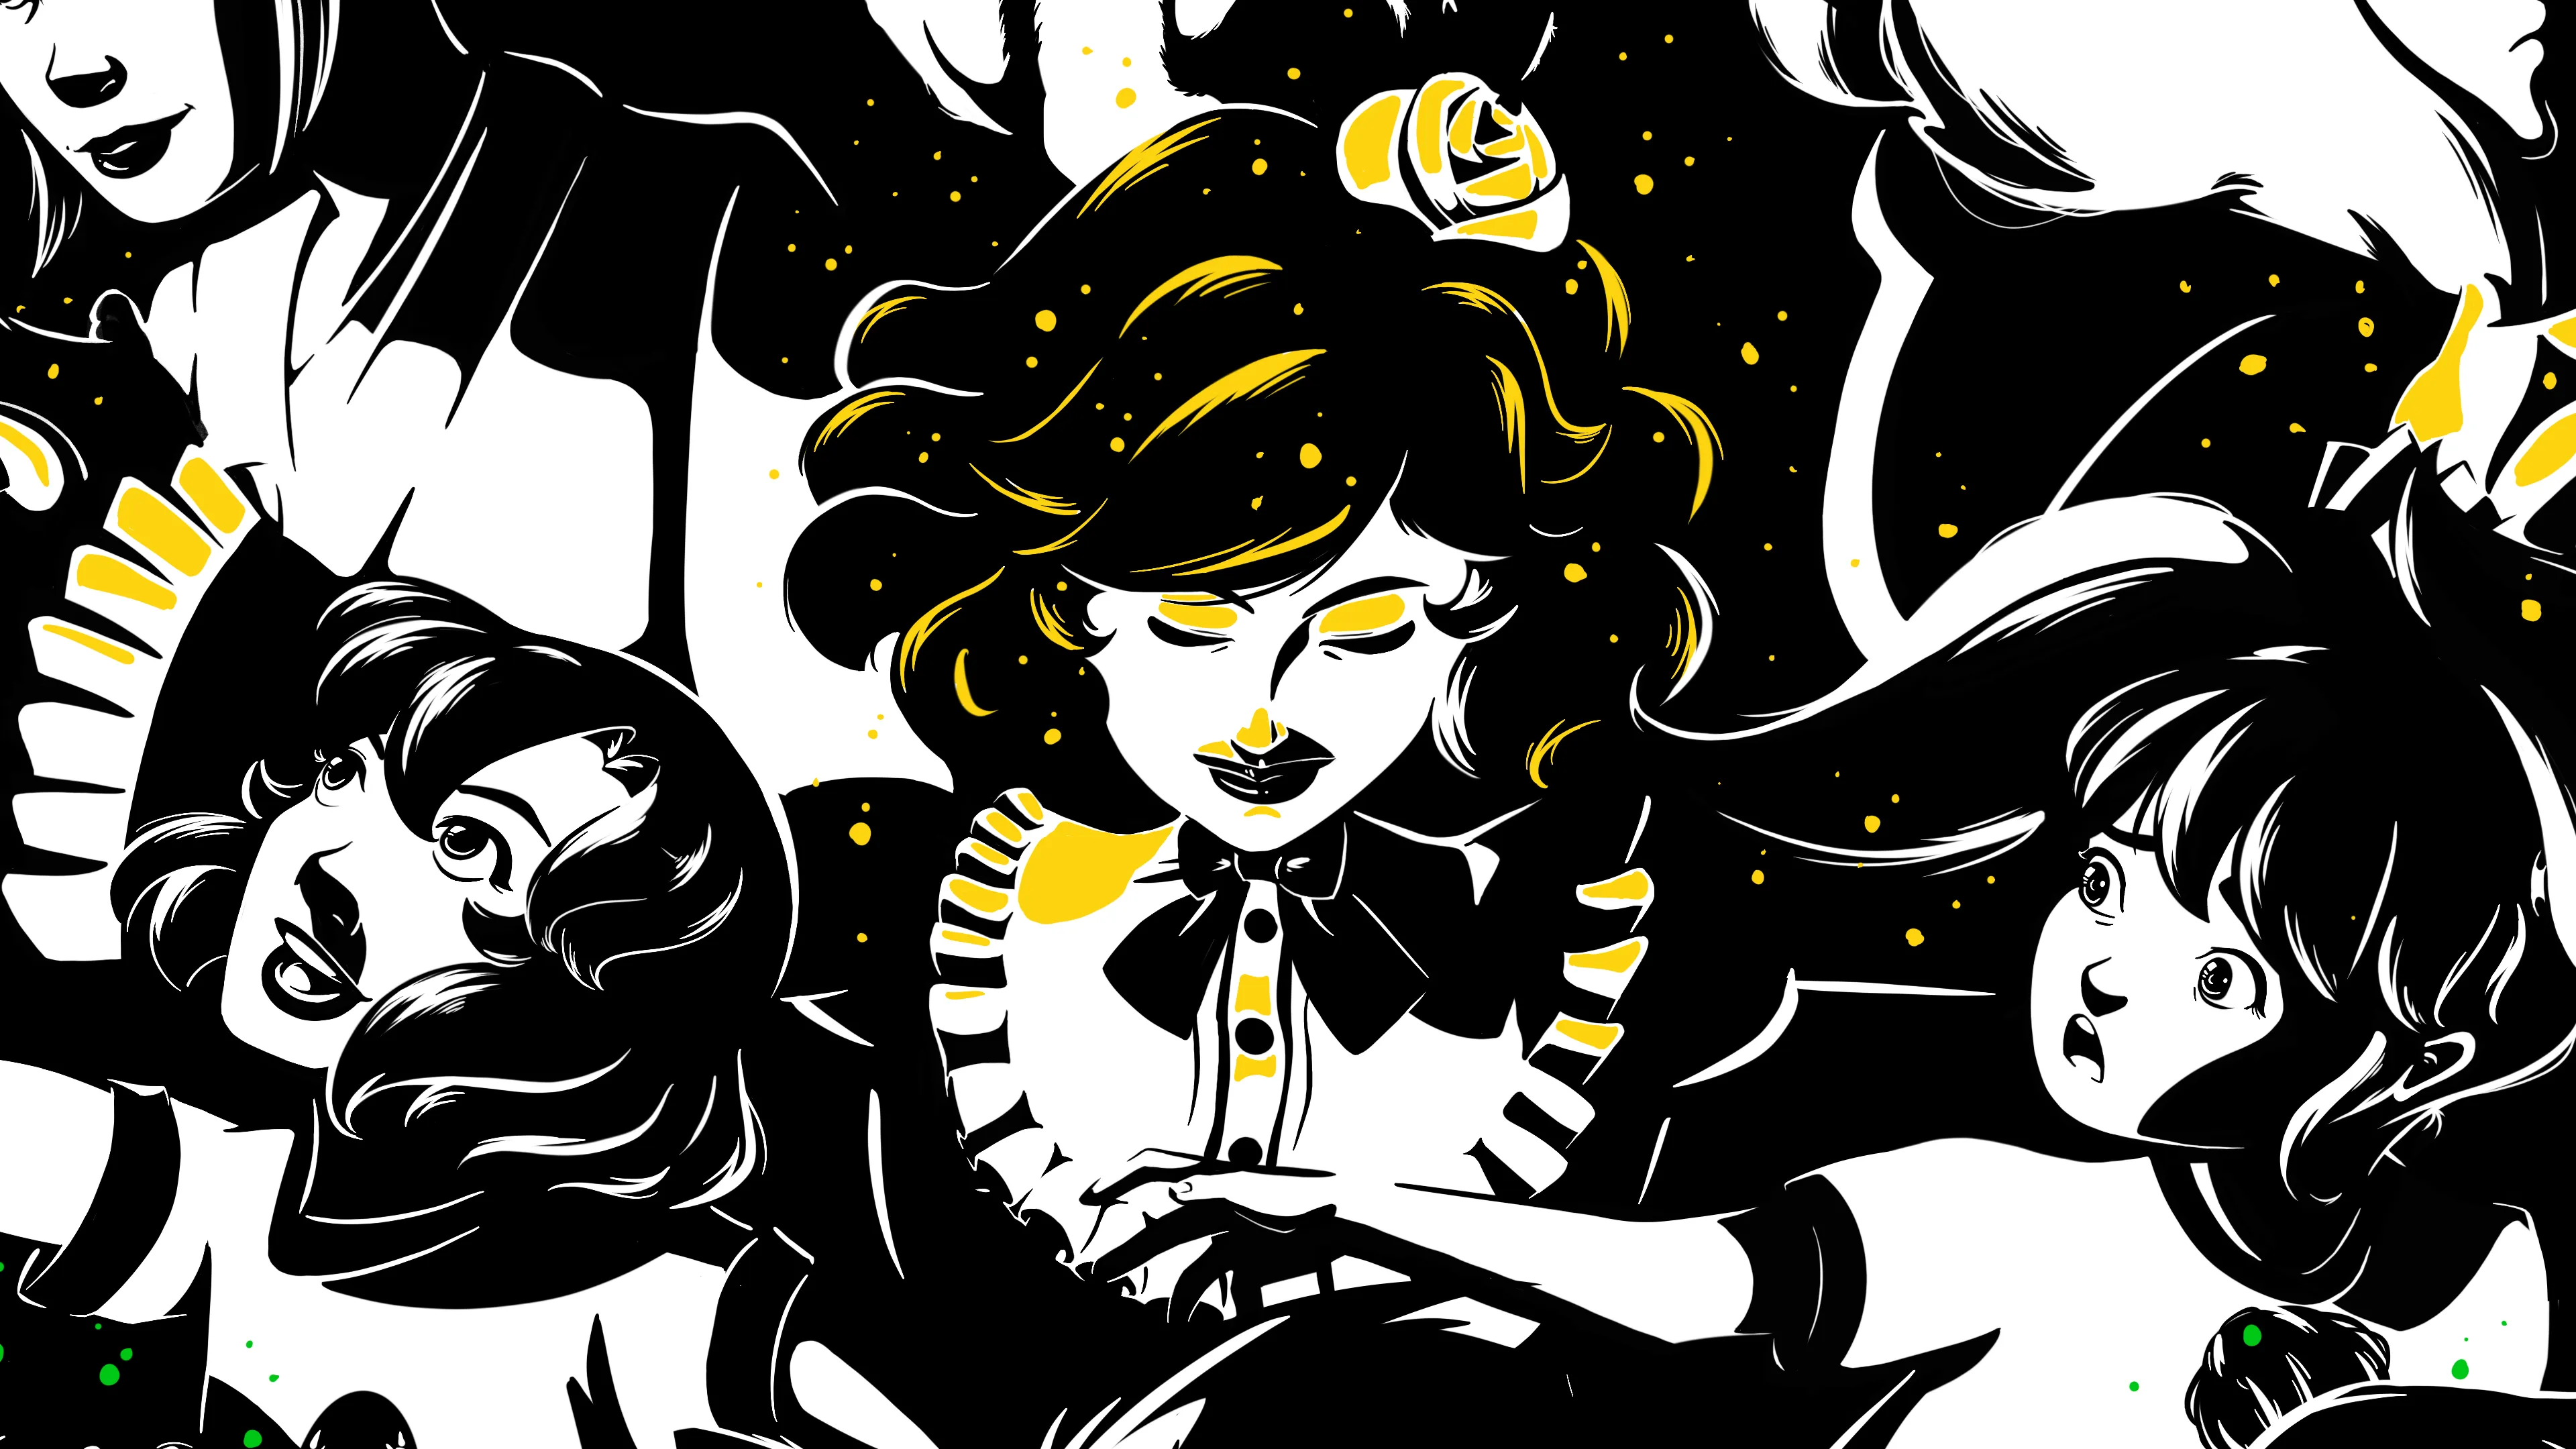
Let’s take a closer look at her face and hair:
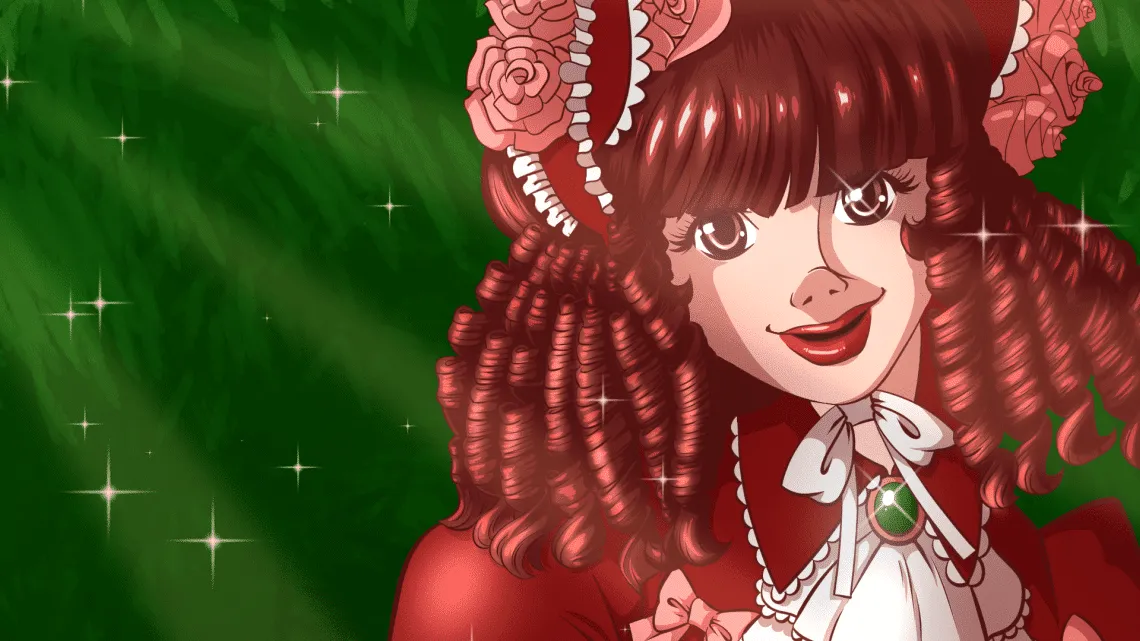
I didn’t use the custom brush to make the end of her ringlets. I drew those myself.
You’re probably also wondering, how did you turn the custom ringlet brush into inked lines?
Haha…
I traced over them…
So I drew the ringlets on their own layer. If you notice the ringlets have a gray shading to them. This was to allow me to layer them as I drew them. I painted the ringlets from back to front to get them to overlap naturally. Once I had something that looked decent, I went to a new vector layer and inked the ringlets. Yeah, nothing magical. Maybe there’s a magical way, but I don’t know it. If you do, drop me a note in the comments. I’d love to figure out a faster process.
I also tried to remove the gray color from the ringlets after I drew them, but honestly the remaining “inked lines” looked really pixelated and terrible.
The Wicker Basket
Here’s a close up of the wicker basket in all its glory: 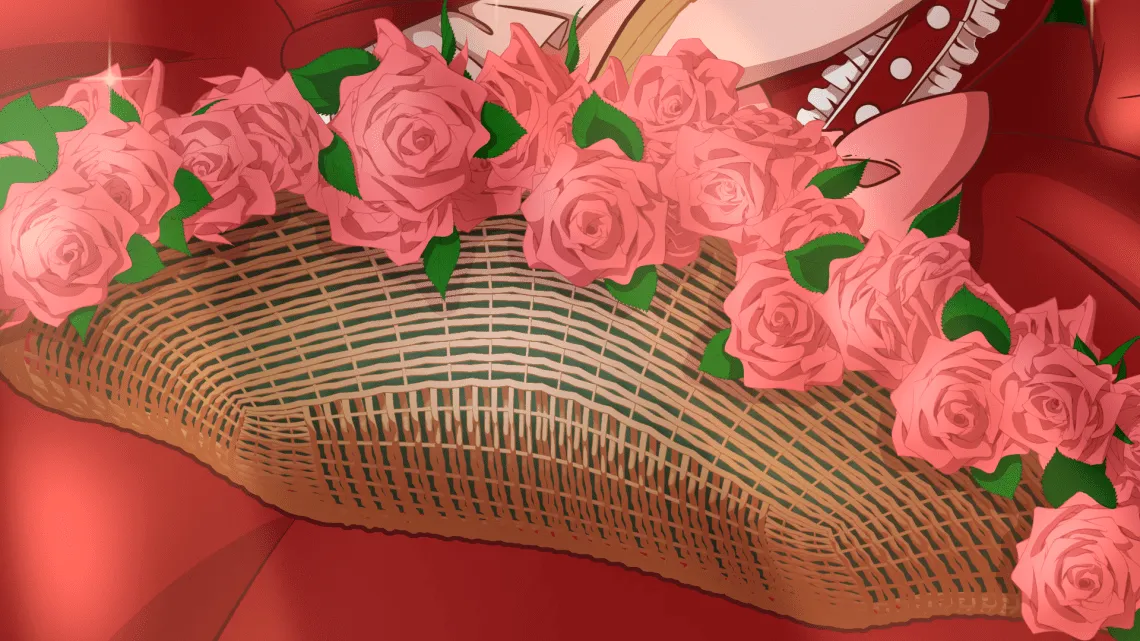
Oh boy. Right?
I thought I might not do the wicker basket. Just leave the element out. If I did, I would have gone back and done more detail with her dress.
I knew off the bat that I wouldn’t be able to draw it the way I wanted. I’d never be able to get that wicker texture. My inked lines would look terrible.
But, I do know Blender and I came across a tutorial a long time ago for making such a basket.
I didn’t watch that particular tutorial again, because I don’t remember what it was. Instead I went to Youtube and looked up 3D wicker basket tutorials. Yes, you could probably also go to a 3D modeling repository site and buy one or download a free one. I did investigate them, and anything that looked decent cost money. But, its not too hard to roll your own wicker basket.
It works like this:
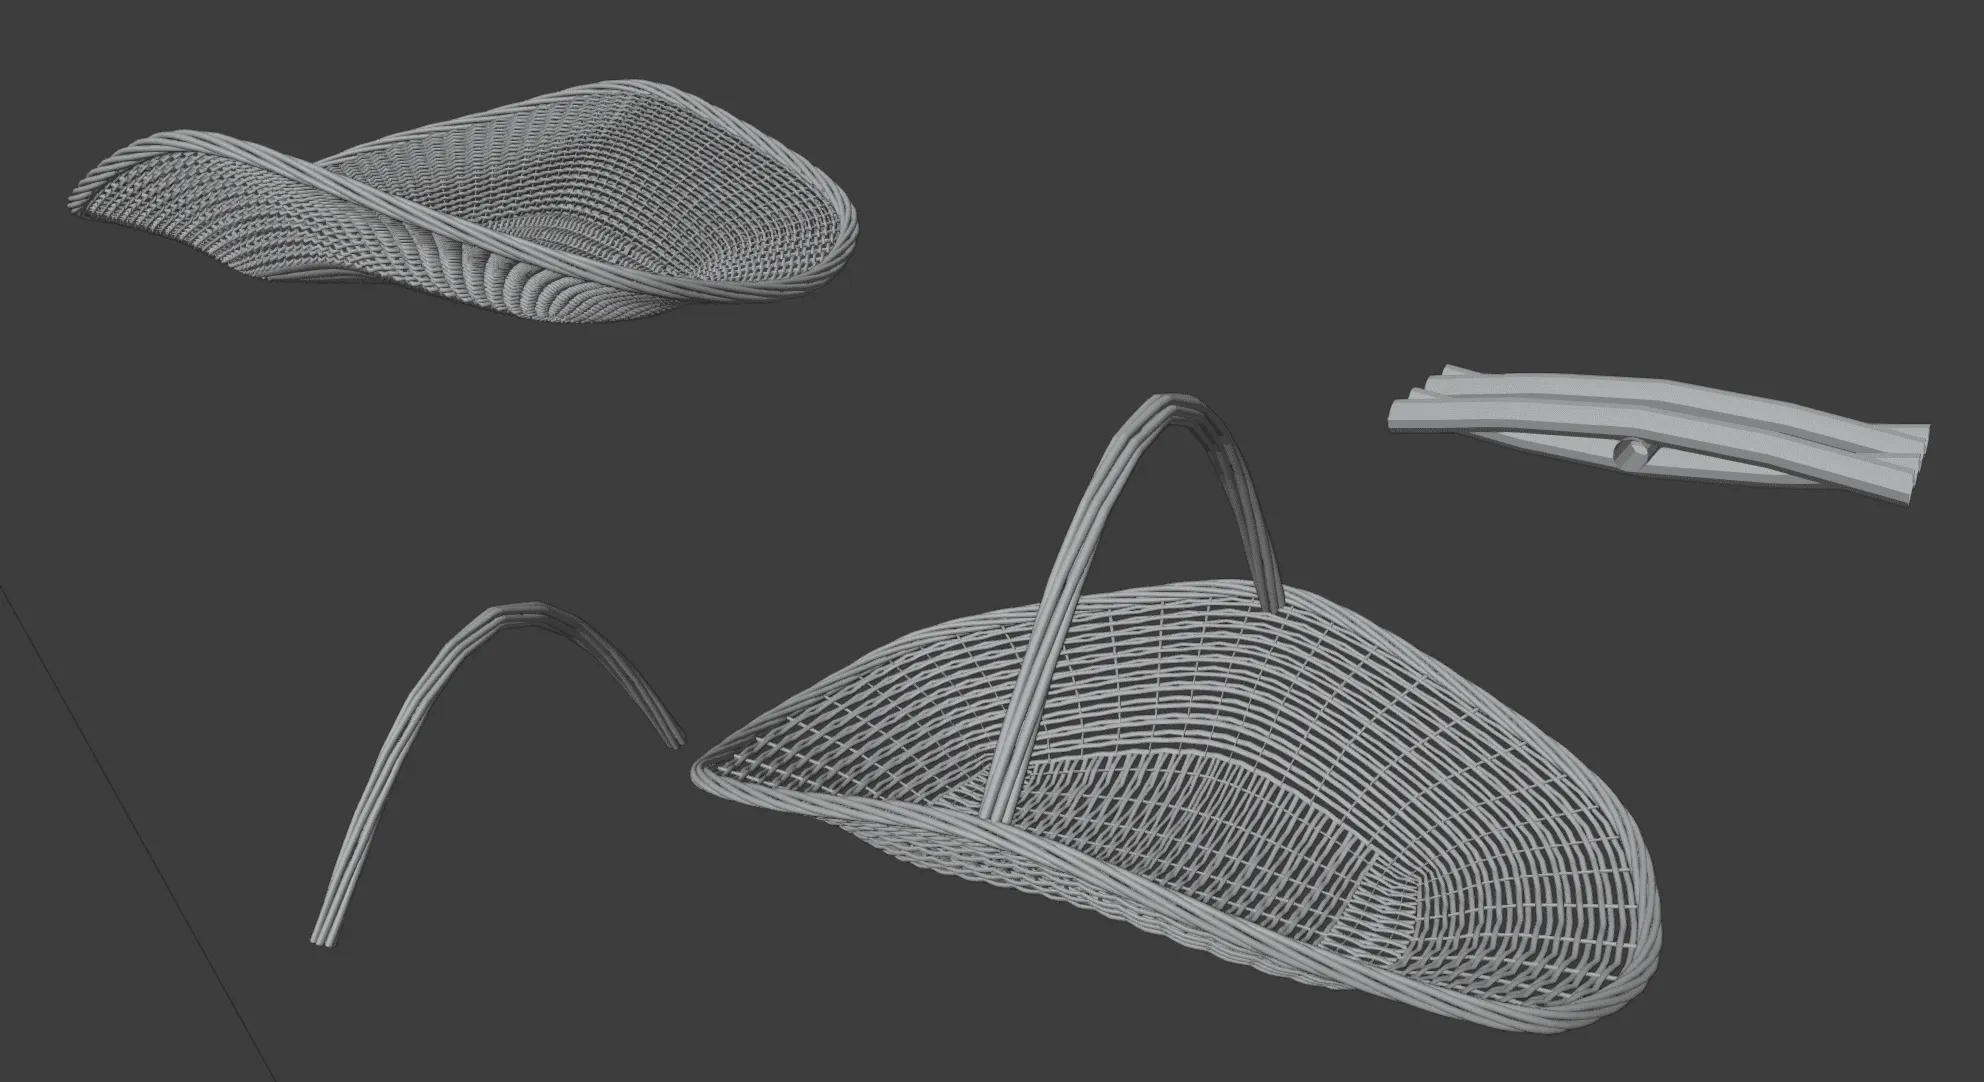
You create a tiny patch of the wicker. You can see it on the right.
There’s a plugin for Blender called Tissue that allows you to replicate a mesh over a surface. So I created the surface of a simple wicker basket. This took me a while to get right. You don’t want to make something that’s very dense mesh-wise. I also didn’t want to make the wicker too small or otherwise it would look like noise. I mean, if that’s the case, why not just paint it like noise? Since my art’s a bit cartoony, I wanted to have bigger wicker threads weaving around one another, and I certainly do like the end result in the illustration. I think it looks better than I could have imagined.
The lip of the basket and the handle are much more complex to explain. Basically I started out with six circles and make some twisted tubes — there is a non-impossible way to make this using Blender’s modifier stack.
Once you make the twisted tubes you can have them follow a path. To make the path around the lip of the basket, I selected the basket top edge and turned it into a curve and then had the twisted tube follow along it. There’s a little bit to try and get the beginning and end of the tube to touch and some vertices to fix up, but it’s not too bad.
The same with the handle. I fudged things a bit. For instance there’s no sense in how the wicker basket handle attaches to the basket itself, but in the illustration you’re only seeing the side of it and its covered in flowers so I figure it won’t matter all that much.
To place the wicker basket in the image, I did this:
I created an orthogonal camera — this type of camera obviously has no perspective warping so everything will appear flat which matches how I want it in the illustration. You’re close to her so there shouldn’t be much warping to the basket due to a “camera lens.”
I set the camera to the same pixel dimensions as the illustration. Next, I imported the illustration itself into Blender and copied over a finished version of the basket into the same Collection and posed it over her arm.
The scene in Blender looks like this from a non-camera angle (you’re looking at the camera view when you view the illustration itself):
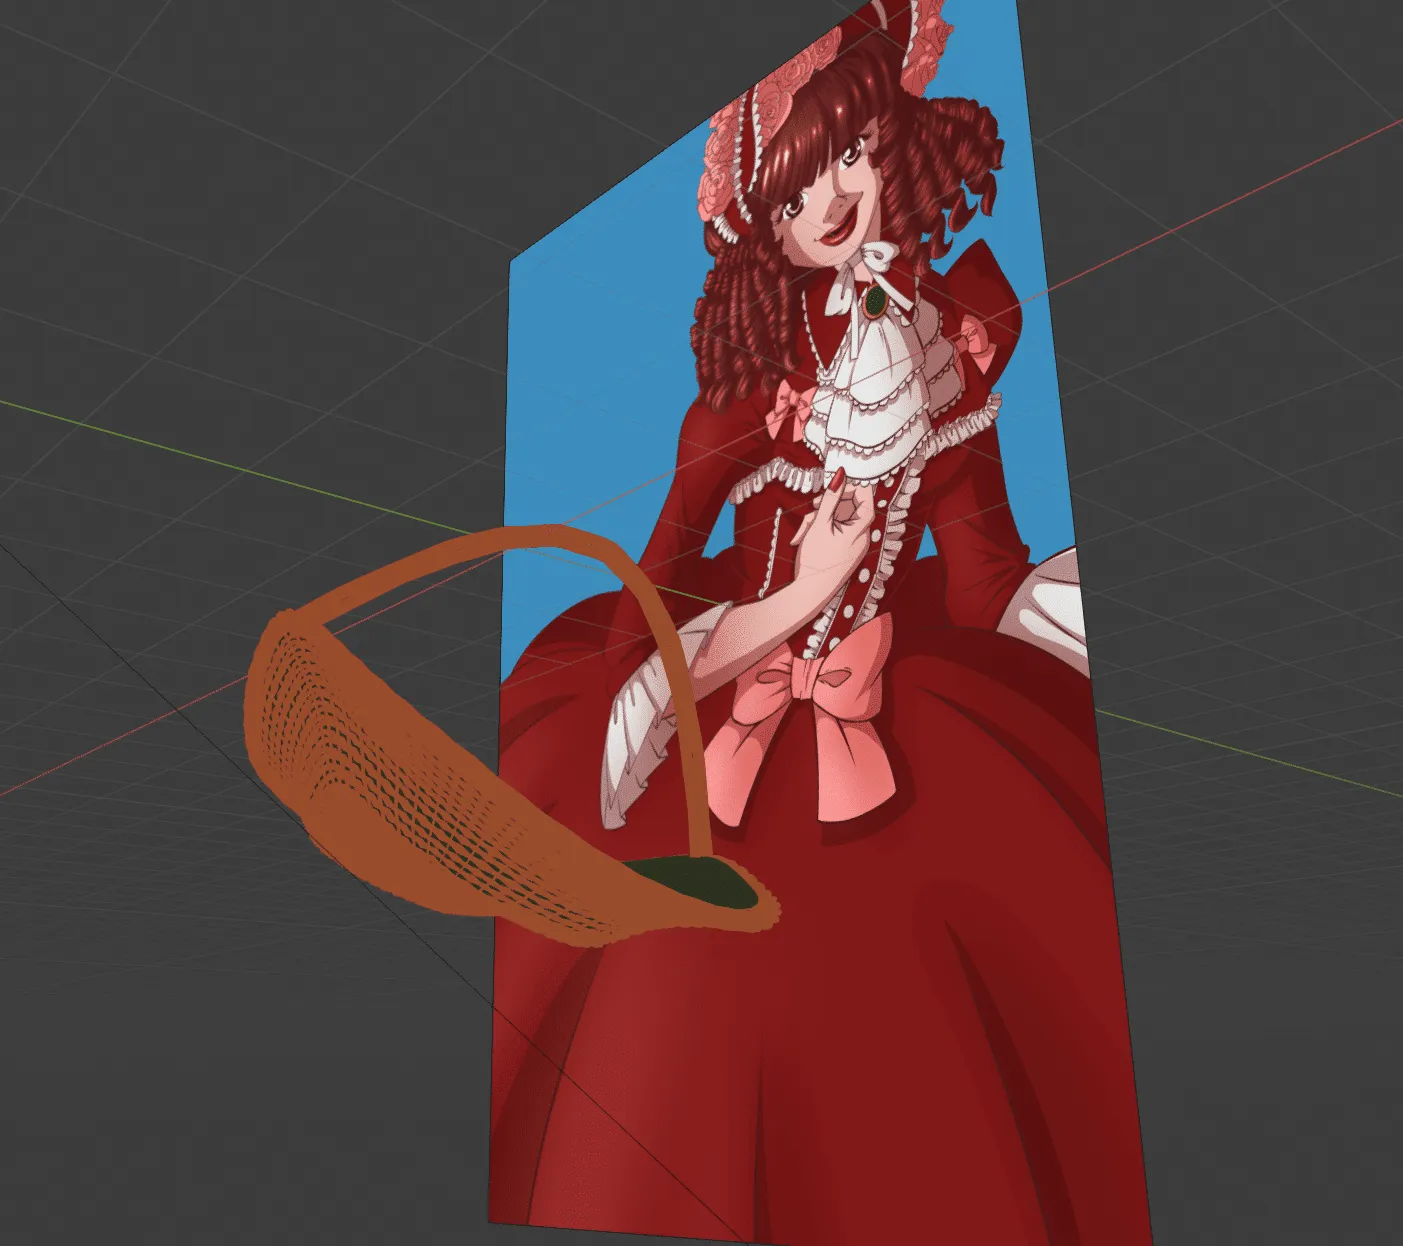
It sits in front of the drawing. I knew I would have to mask out apart of the handle.
I played around with rendering out only inked lines but honestly the wicker threads are so thin it looked awful. Blender has a tool called “Freestyle” that allows you to ink your 3D meshes to prepare them for 2D illustrations, but sometimes it’s hit or miss.
I decided I wasn’t going to “ink” it with Blender.
I was only going to toon-shade it and render it out. Here’s what the toon shader and scene looks like with from the camera POV:

Here’s the final basket render:
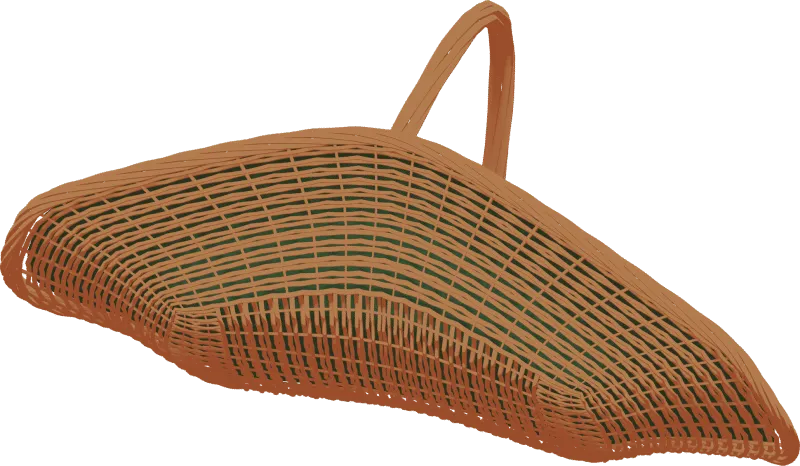 LOL, right, all that business for just this.
One issue with the wicker threads being so big: you can see through it. I didn’t want that, so I decided that the flowers in her basket would sit on a green cloth.
I used the shape of the basket that I used to make the wicker basket and duped it for the “cloth” interior. It’s just to make it opaque and nothing else. Not like you would really notice it anyway.
Now with the basket rendered, I can drop it into the illustration as its own layer. I masked out the part that’s behind her arm. I also outlined the basket with the same ink color to give it the sense that its inked. In the final illustration, I’ve also got more than just the toon shading. I selected the color of the basket and added some gradients to give the bottom and sides some more ambient occlusion and a little more highlight on the front of the basket.
It did take a few days to do this whole thing with the basket, but I’m happy with the result and I feel like I learned something.
The Roses and the Rest
I used one of Clip Paint’s built in rose brushes. I poked the digitizer pen to drop a flower at a time to get something nice looking. From there I colorized the roses on a separate layer and did the painstaking work of cel-shading them using the lasso tool and a multiply layer.
I like using various effects. I didn’t have an idea of what they would be, but as I worked, I thought some god rays cast across the image might add something. It would be nice if the sunshine also touched her dress so I increased the lighting over parts of the dress where the light shines.
Sparkles, of course.
The background I really copped out on. I did a green and then painted it with some very large bristly brushes. It looks like a giant pine tree, but honestly, it’s abstract, but you can view it how you please.
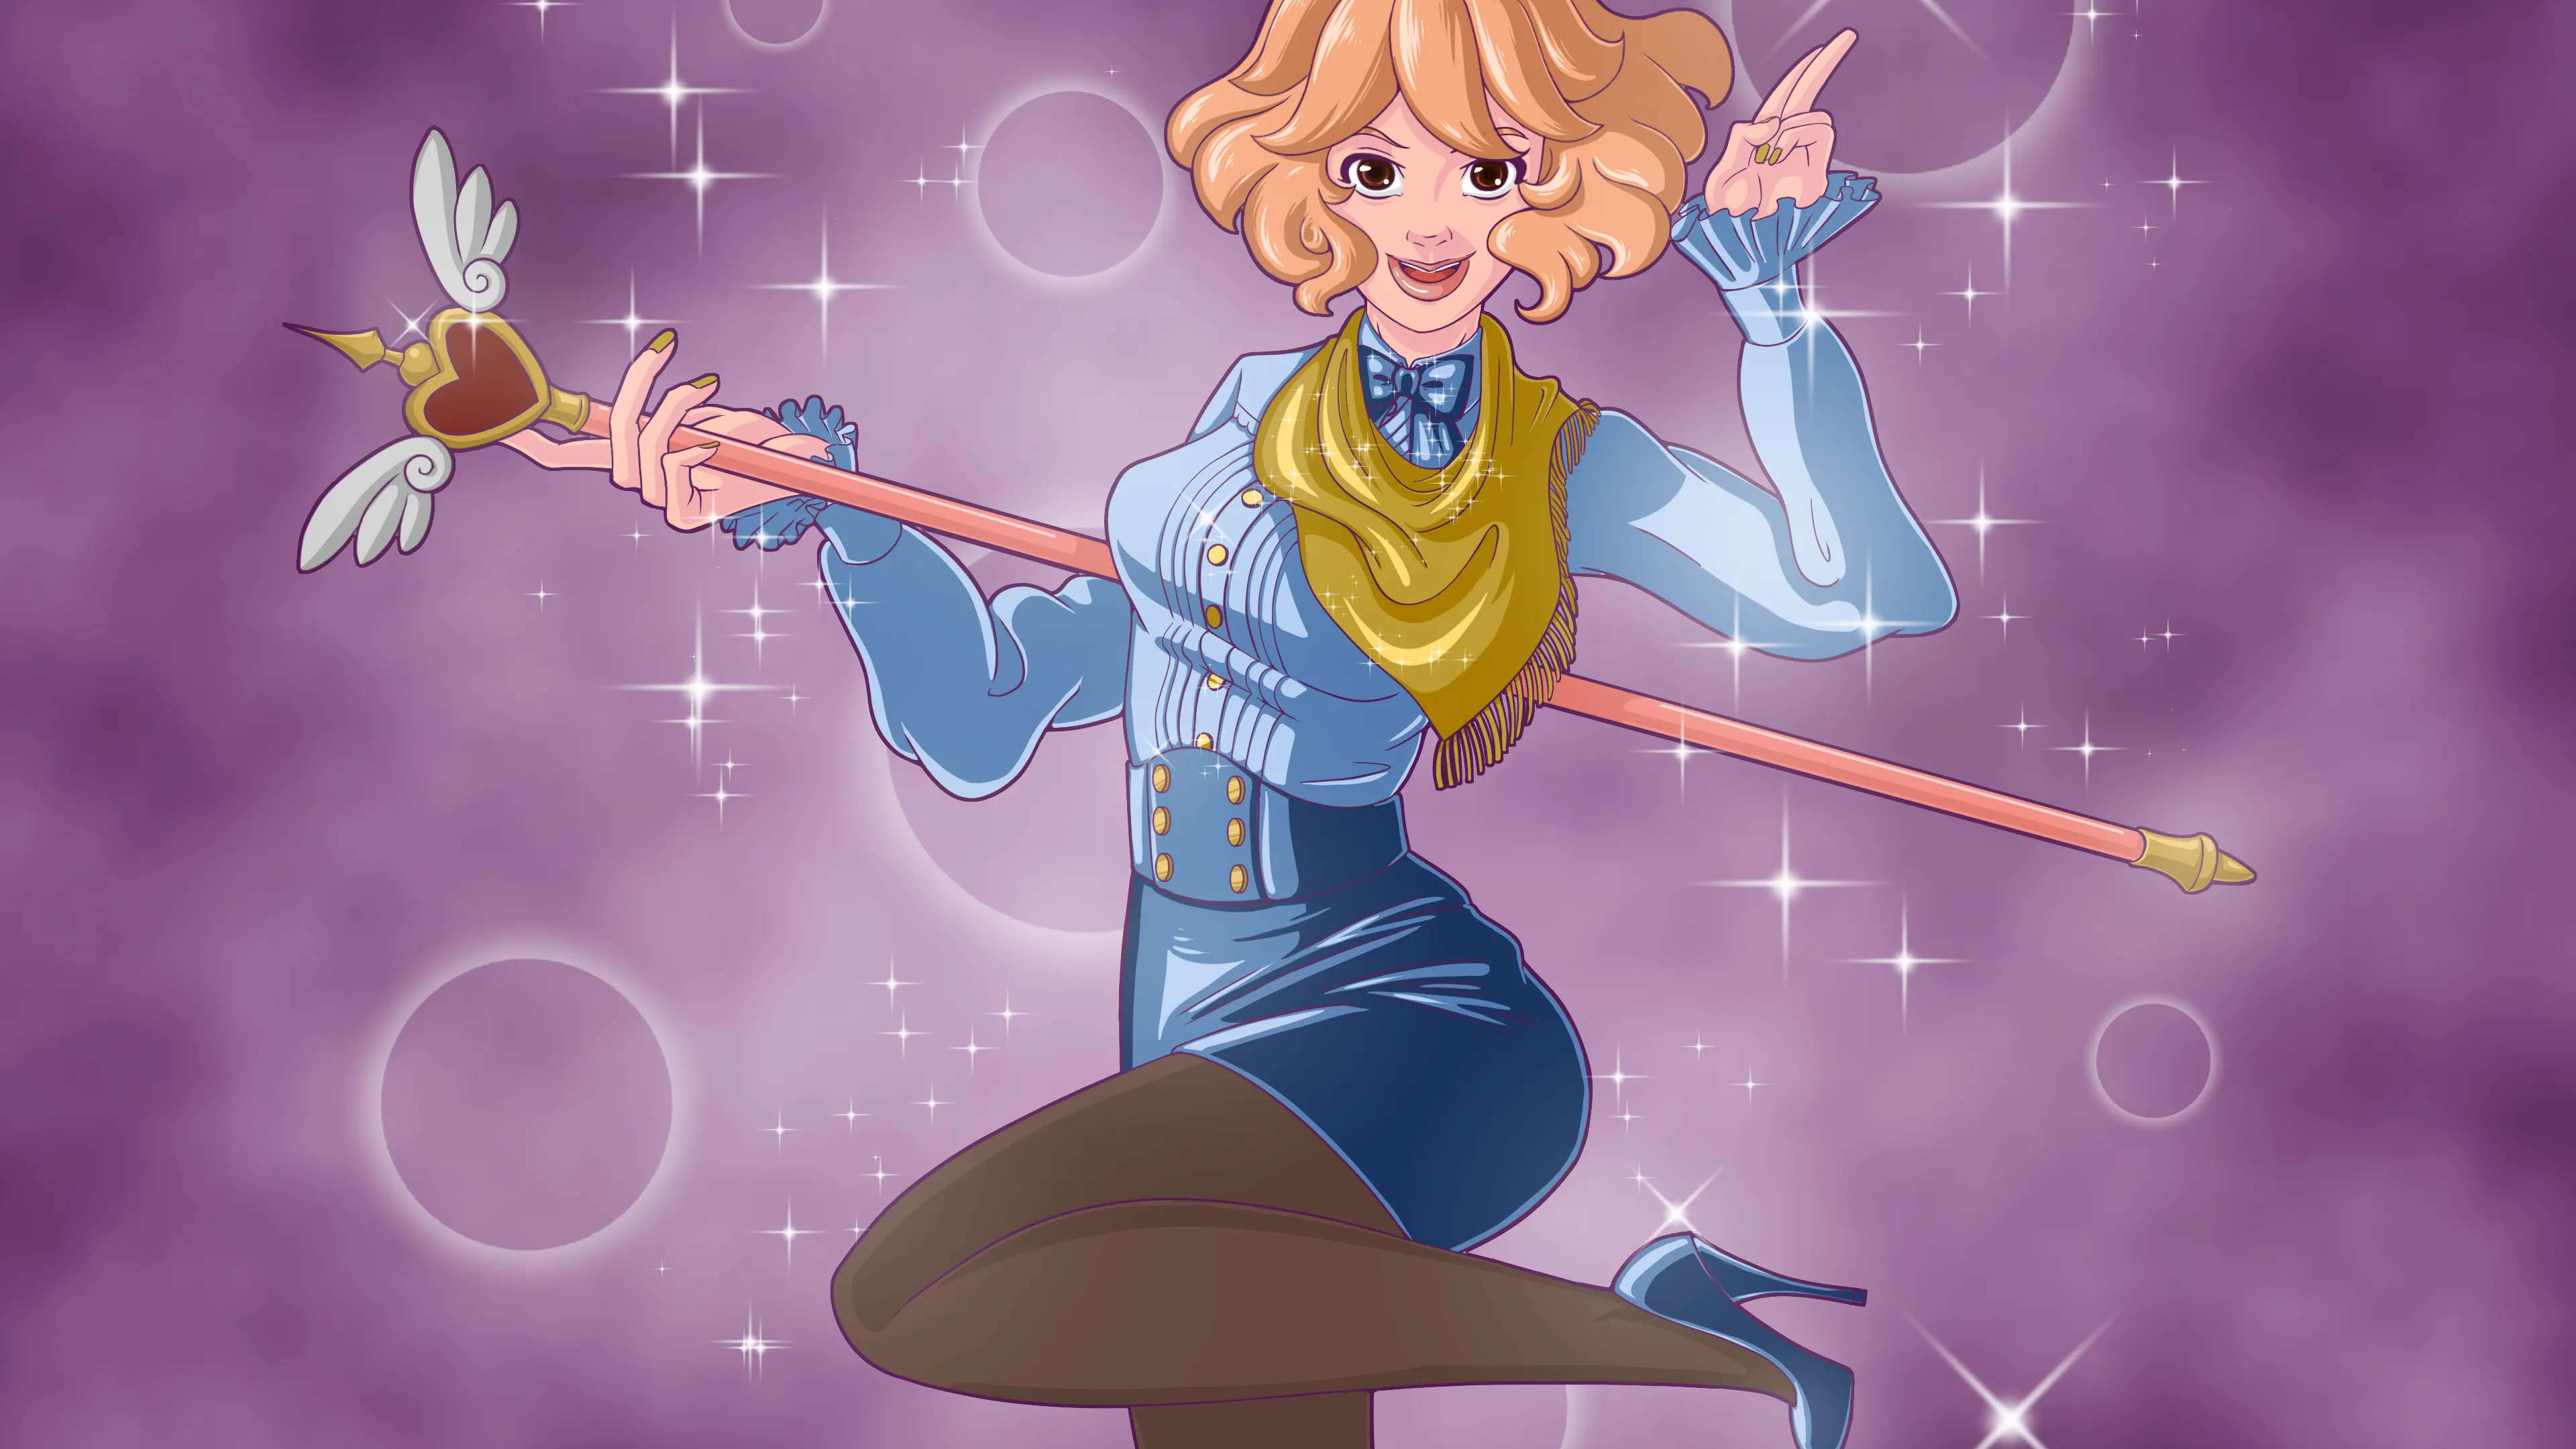
Variant
This illustration took me about a week and overall I’m happy with it. I’m enjoying working with Clip Paint again. I can work faster and make better finished work. I’ve been experimenting with a new way of coloring that doesn’t involve having 100s of layers. I can flat everything on one layer and then use cropped layers to build up the cel-shading, gradients, and other efffects. It’s much cleaner and easier to deal with, and I think the result looks decent enough for my purposes.
So as a last thing, I made this. Originally I didn’t know what color her dress should be. In the end red seemed right since red, white, and green are Christmas colors. But I experimented with a pastel blue as well:
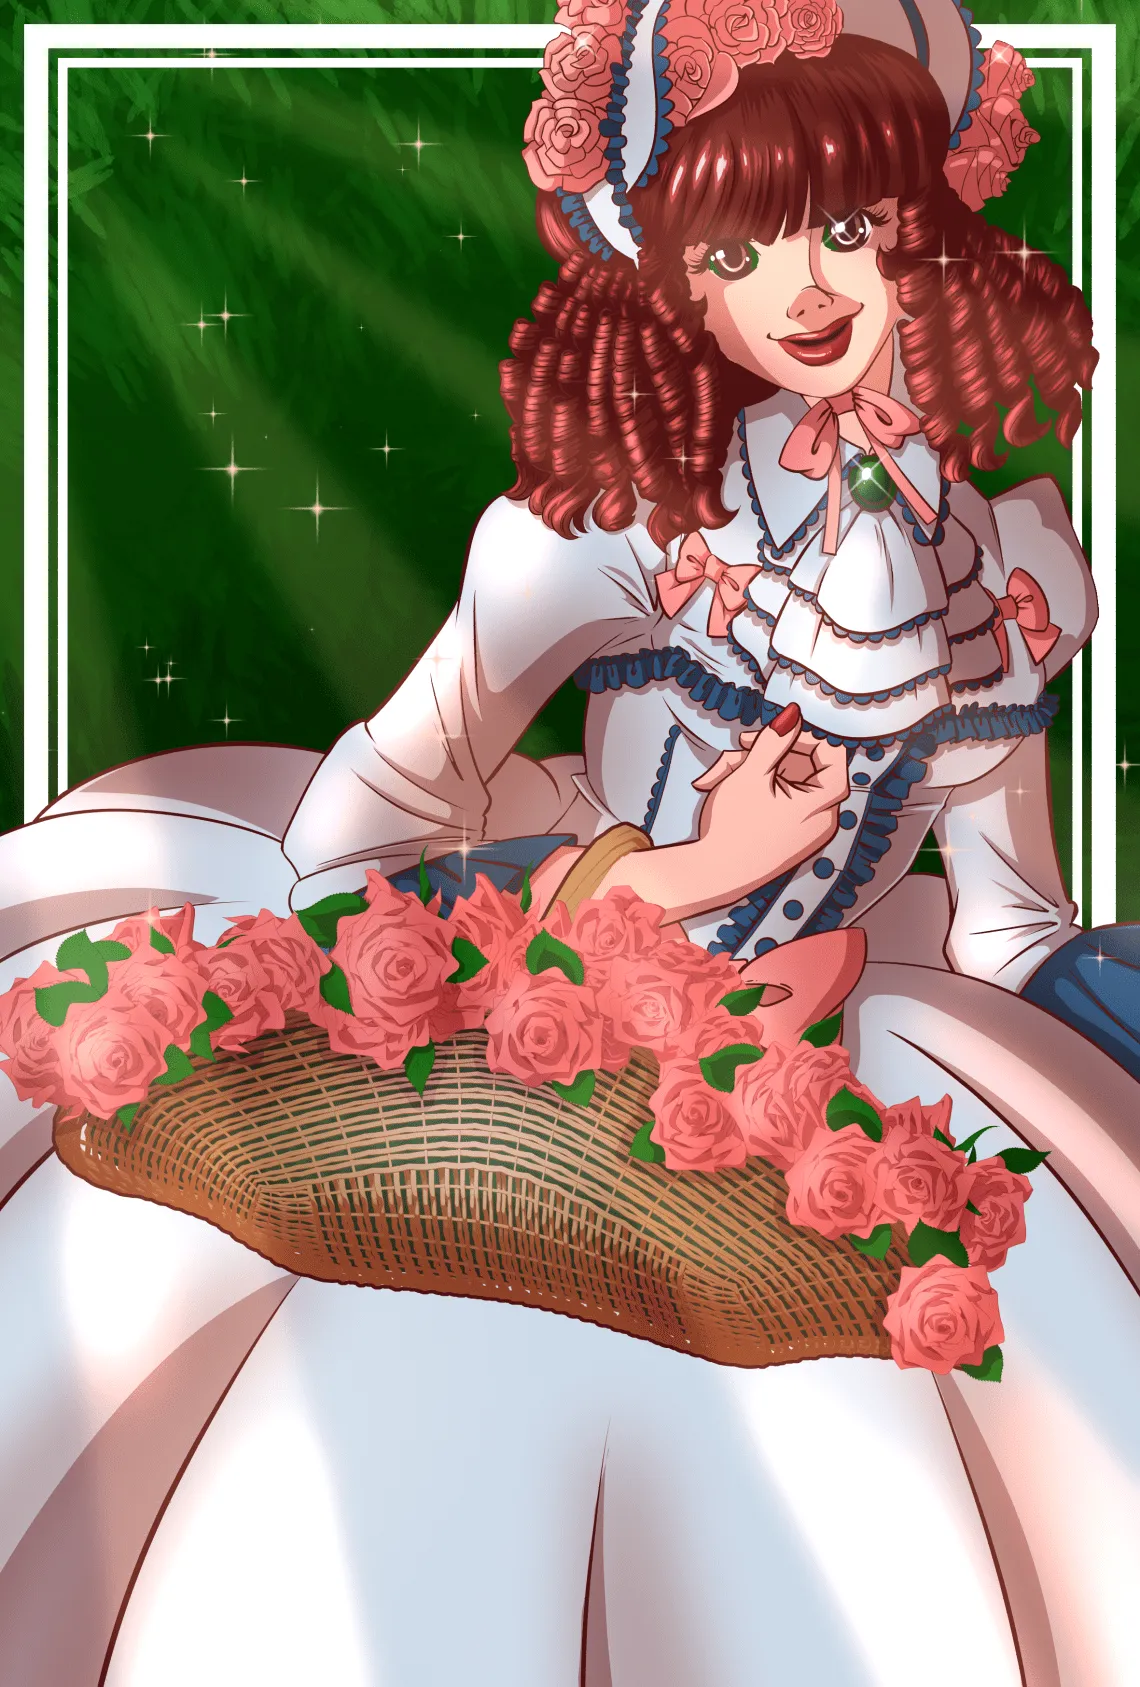 So, the shading is a bit (just a BIT) weird. But that’s because everything was done for a red dress, but I simply swapped the base flat colors.
I hope you enjoyed a breakdown of how I created this illustration. There are a lot of advanced techniques, but I feel like I learned how to do a lot of different things to improve my art and even work faster. What is hard this first time won’t be next time because I will have done it once before.
Till next time…